Alchemy Factory: FAQ and Pro-Optimization Guide
This comprehensive guide covers frequently asked questions and advanced optimization strategies for Alchemy Factory, based on over 20 hours of gameplay experience. Whether you are struggling with shop management or trying to calculate the most efficient fuel, these tips will help you scale your production from a small workshop to a multi-story industrial powerhouse.
1. Beginner Essentials: Scaling Your Business
Many new players feel limited by the initial shop size and manual labor. Here is how to progress past those hurdles:
- Expanding the Shop: You are not stuck with the starting area. Early quests will guide you to buy new plots of land for machine placement.
- Customizing Infrastructure: By upgrading your building tools, you can demolish and rebuild floors and walls to design your “dream shop”.
- Automation Milestones: * Auto-Stocking: Use the Catapult (unlocked early) to fill shelves automatically.
- Auto-Checkout: At Tier 4, you can purchase the Auto-cashier, removing the need to manually wait on customers.
- Automated Logistics: Combine Trading Portals (for buying raw logs/stone) with Auto-cashiers and Catapults to create a closed loop: Sell Items $\rightarrow$ Send Coins to Portal $\rightarrow$ Portal buys raw materials $\rightarrow$ Machines process them $\rightarrow$ Catapults stock shelves.
2. The “Hidden” Forms System (Hotkey: T)
One of the most powerful but overlooked features is the “Change Form” hotkey. Most machines and furniture have alternate configurations:
- Conveyors: Sloped conveyors can have their direction flipped.
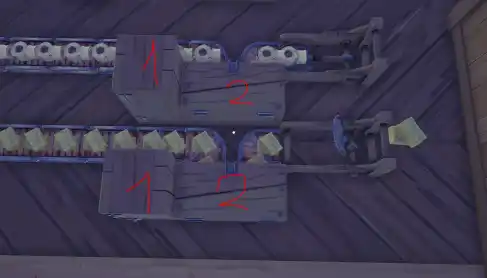
- Machines: Asymmetrical machines (like the Assembler) can be mirrored to fit your layout.
- Storage: The basic chest can be turned into a “pass-through buffer” or placed vertically to save floor space.
- Splitters & Filters: These can be laid on their side to change how they interact with multi-level belts.
3. Financial Strategy & Currency Management
In Alchemy Factory, money is a physical object on your conveyors, not just a digital number.
- Quest Buffers: Quests pay 130% to 200% of market price. Keep a dedicated chest for “Quest Stocks” so you can fulfill orders instantly.
- The Trap of Unlocking: Do not unlock new items in the research tree until you are ready to produce them; quests can ask for any unlocked item, and if you can’t make it, you lose a high-profit opportunity.
- Currency Optimization: Coins on a belt can stack up to 50. To prevent high-value silver from sitting uselessly on long conveyors, use Bank Portals to exchange denominations.
- Pro Strategy: Buffer coins after the cashier $\rightarrow$ Exchange to 1 Silver $\rightarrow$ Transport $\rightarrow$ Exchange back to 50 Copper at the production site to pay for raw materials.
4. The Fuel Efficiency League
If you want to maximize your “Heat per Copper” (H/C) ratio, follow these calculations:
- Log: 10 H/C.
- Planks: 20 H/C.
- Charcoal Powder: 28 H/C.
- Coal (from Ore): 13.5 H/C.
Verdict: Until you reach the late game, Planks are the most cost-efficient fuel. However, for the Blast Furnace, you must use Coal because planks burn too slowly to keep up with its massive consumption.
5. Advanced Mechanics: Relics and Multi-Floor Factories
- Verticality: Once you run out of land, build up. Use Vertical Conveyors and stairs to manage a 3 or 4-story factory.
- Upgrade Points (Relics): At Tier 5, you can craft Relics (like Jupiter) and convert them at the Altar of Knowledge for upgrade points.
- The Relic Warning: Relics are very expensive to produce. If you study all of them, you will run out of money. Balance is key: Sell three relics to maintain your budget for every one relic you “study” for points.