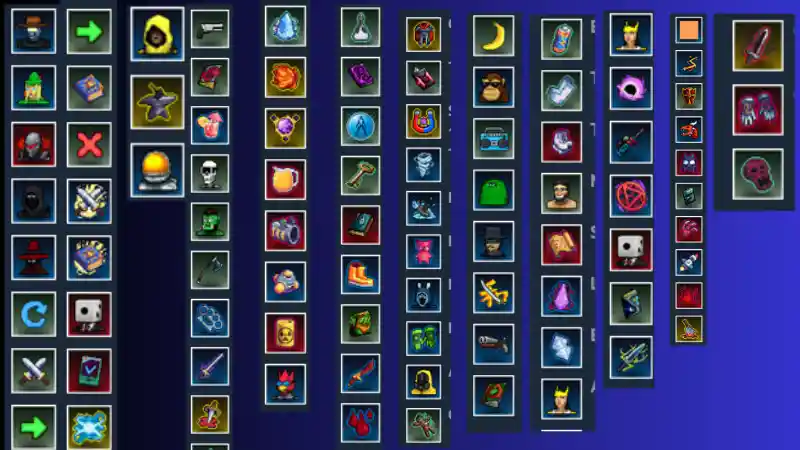
Megabonk – A Guide to 100% Achievements
This is your ultimate, no-BS guide to getting all 102 achievements in Megabonk. We’re breaking down every achievement, from the easy grinds to the super-tough challenges, with the best strats to get that 100% completion.
Aight, so you’re diving into the chaotic world of Megabonk, and you’re an absolute legend who’s decided to go for the 100% achievement completion. Bet. With 102 achievements to snag, it’s a serious journey. Most of them you’ll get just by playing, but some are real head-scratchers that require specific builds or some big brain plays.
That’s where this guide comes in. We’re not here to tell you how to “kill 15,000 goblins”—you’ll get there. We’re here to give you the roadmap for everything, with a special focus on those super-annoying achievements that make you want to rage-quit. Say less, let’s get this bread.
The No-Brainers: Progression & Unlocks
These are the achievements you’ll get just for playing the game, completing quests, and finishing a few easy challenges. Don’t even stress about these; just enjoy the ride.
- Character Unlocks: You’ll unlock
CL4NK,Robinette,Sir Chadwell,Ninja, andVladjust by completing the Tiers for the Forest and Desert zones. Pro-tip: There are no unlocks at all tied to Desert Tier 3, so you can completely ignore it. - Quest Milestones: You’ll unlock
Refresh,Weapon Slots,Skip,Tome Slots,Banish,Weapon Slots 2, andTome Slots 2by completing quests. Keep doing your quests, and you’ll eventually unlockDiceheadat 100 quests. - Other Progression Unlocks:
Togglerunlocks after buying 40 items, and theEnergy Coreunlocks after beating the Final Boss twice. - Challenge Completions: You need to beat a total of six challenges to unlock everything. This will get you
Tony McZoom(2 challenges), theAnvil(3 challenges), andSpaceman(6 challenges). The Tier 1 challenges are super easy, so just pick any six you like.
The Grind Time: All Kill-Based Achievements
This is your “turn your brain off and grind” list. You’ll get these by killing a certain number of enemies with specific weapons or damage types.
- Revolver: Kill 7,500 enemies.
- Blood Tome: Kill 12,500 enemies.
- Idle Juice: Kill 500 enemies while standing still.
- Calcium: Kill 1,000 Skeletons.
- Ogre: Kill 15,000 Goblins.
- Axe: Kill 2,000 enemies with the Sword.
- Brass Knuckles: Kill 5,000 enemies with the Sword.
- Dexecutioner: Kill 12,500 enemies with the Sword.
- Joe’s Dagger: Kill 10,000 enemies with the Dexecutioner.
- Ice Crystal: Kill 50 enemies with the Frostwalker.
- Dragonfire: Kill 4,000 enemies with Fire damage.
- Lightning Orb: Kill 3,000 enemies with Lightning damage.
- Grandma’s Secret Tonic: Kill 3,000 enemies with the Sniper Rifle.
- Cannon & Mines: Kill 5,000 and 7,500 enemies with Rockets. Pro-tip: Kills from both the Slutty Rocket and the Slutty Cannon count towards these.
- Toxic Barrel: Kill 2,000 enemies with Poison damage.
- Birdo: Kill 100 enemies with the Tornado weapon while you’re being carried by a tornado in the Desert. Sounds complicated, but it’s easier than it looks.
The Big Brain Grinds: Your Guide to the Hardest Achievements
Aight, this is the real meat of the guide. These are the achievements that are a total pain. Here are the strats to cheese them.
Slaying the Cactus (The Worst Achievement)
- Achievement:
Cactus– Kill 100 cactus enemies with Thorns damage. - The Problem: This achievement is pure RNG hell. You need three things to line up: you need the Cactus enemy to actually spawn in your Desert run (which isn’t guaranteed), you need to get the Thorns Tome to drop, and then you need to actually kill them by letting them poke you to death without dying yourself. Big yikes.
- The Strat:
- The Setup: Refund your weapon slot upgrades. You don’t need them. You want three tome slots for the Thorns Tome, an Armor Tome, and a healing tome like Shields or Lifesteal.
- The Challenge: Do this on the “Hyper” challenge of Desert Tier 1. This boosts enemy spawns, which means more cacti when they do decide to show up.
- The Character: Athena is your best bet. She has thorns by default.
- The Grind: Start a run. If you don’t see any cacti spawn by the 7:00 minute mark, just restart. It’s not worth waiting. When you do find them, just run into them and let your thorns do the work. It’s a miserable, brainless grind, but this is the fastest way to do it.
Getting the Hero Sword (The “Pure” Run)
- Achievement:
Hero Sword– Defeat a Stage Boss without picking up any items, powerups, or using shrines. - The Problem: You have to beat a boss using only the upgrades you get from leveling up. No items, no powerups from swarms, no shrines.
- The Strat:
- The Setup: Do this on Forest Tier 1. Use ranged weapons like the Bow or Sniper Rifle so you can stay far away from any powerups that drop. You’ll want to have all your weapon and tome slots unlocked before you even try this.
- The Run: Your number one priority is getting the XP Tome. This will help you level up faster. When the swarms come, kill them from a distance. Be super careful not to walk over the powerups they drop. If you pick one up, you have to restart.
- The Boss: Lure the boss away from any powerups that might have dropped. With a good ranged build and enough levels from the XP Tome, you should be able to melt the boss without needing any other buffs.
Snagging the Gamer Goggles (The Low HP Kill)
- Achievement:
Gamer Goggles– Defeat a Stage Boss with less than 10% HP left. - The Problem: You have to be almost dead when you kill a boss. Trying to get hit by the boss to lower your health usually just gets you killed.
- The Strat:
- The Character: Pick a character with high max HP, like Monke. The more health you have, the bigger that 10% window is.
- The Build: Focus on pure DPS. You want to be able to kill the boss ridiculously fast.
- The Cheese: Play through the level normally. Before you go to the boss altar, find a cliff and intentionally take fall damage over and over until your health is just barely in the red (below 10%). Then, walk over to the boss and absolutely nuke it before it can even touch you. Make sure you don’t have any health regen or lifesteal that could heal you during the fight.
Surviving the Final Swarm
- Achievements:
Ghost(survive 60s),Bob (Dead)(survive 2 mins),Soul Harvester(survive 6 mins). - The Problem: The Final Swarm that appears at the end of a run gets infinitely stronger. Surviving for six minutes is a huge challenge.
- The Strat:
- The Build: This is all about being a tank. You need Armor, Evasion, and the Aegis weapon. Lifesteal is also clutch for getting your health back. Damage doesn’t matter as much as just not dying.
- The Location: The best place to do this is on the final boss map. Why? Because the map is mostly just empty space. The enemies will push you around a lot. On this map, they’ll launch you into the air over the void, where they can’t hit you. You’ll get juggled around like a pinball, which is actually the safest way to survive. Getting pushed into a corner on a normal map is a death sentence. Getting yeeted into the sky on the final map is the key to victory.