
Megabonk – How to Create Red and Pink Flashing Strobe Lights
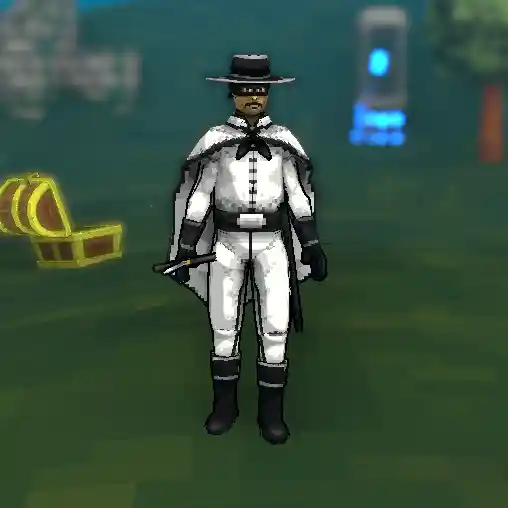
This is your guide to the infamous Red & Pink Flashing Strobe Lights build, also known as the Seizure Build, for the character Bandit in Megabonk. We’re breaking down the weapons, tomes, items, and strategy you need to turn your screen into a 12 FPS slideshow of pure destruction.
Aight, so you’re free from epilepsy, you enjoy turning your screen into a two-colored flashing LED show, and you want to feel the power of a thousand suns combined with a sword the size of the entire map.
Say less. This guide is for you. We’re diving deep into the legendary “Seizure Build” for the character Bandit. It’s a chaotic, screen-filling, FPS-destroying build that is, no cap, one of the most fun ways to play the game once you get it online.
The Vibe: What is the Seizure Build?
The whole point of this build is to fill the entire screen with massive, flashing red and pink particle effects until your enemies (and your GPU) melt. We’re talking about taking the wide, slashing attacks of weapons like the Dexecutioner and Katana, combining them with the fiery trail of the Flame Walker, and scaling up their size to absolutely ridiculous proportions.
The result is a high-damage, massive-AoE build that deletes entire hordes of enemies at once. It’s a beautiful, chaotic light show that will almost certainly tank your FPS. It’s a vibe.
The Build Breakdown: All the Components
Here’s everything you need to assemble this glorious mess.
The Character: Bandit
- Why Bandit?: The source doesn’t say, but the logic is sound. Bandit has high base Evasion and Movement Speed. This build wants to be right in the middle of the chaos, so the extra survivability from dodging attacks and the speed to reposition is absolutely clutch.
The Weapons: Your Arsenal of Light
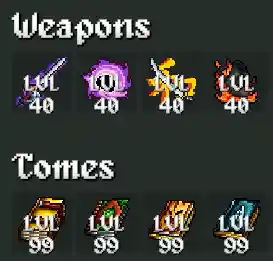
- Dexecutioner: This is your primary damage dealer. Its massive, sweeping attacks are the core of the build’s visual chaos.
- Katana: Your secondary damage dealer. It has great crit synergy and adds even more wide slashes to the screen.
- Flame Walker: This is a key part of the “strobe light” effect. As you run around, it leaves a trail of fire, filling the screen with red particles and dealing constant damage.
- Black Hole: This is your crowd control. The Black Hole pulls all the enemies into a nice, tight ball, setting them up perfectly to be shredded by your screen-sized sword slashes.
The Tomes: The Global Glow-Up
- Luck Tome: Absolutely critical. You need high luck to find the high-rarity items and upgrades this build needs to pop off, especially the Anvil.
- XP Tome: More XP means you level up faster, which means you get more upgrades. It’s a no-brainer for any build.
- Size Tome: This is the secret sauce. You are going to take every single Size Tome upgrade you see. The goal is to make your weapon effects so big they cover the entire screen.
- Curse/Difficulty Tome: This is for the late game. Once your build is online and you’re deleting everything, you start taking Curse to scale up the challenge and the rewards.
The Items: The Must-Haves
- Anvil: This is the most important item in the entire build, period. It lets you upgrade your weapons past their normal limits. You need to find at least one, but two is even better.
- Joe’s Dagger: A direct and massive damage buff for your Dexecutioner. You love to see it.
- Spicy Meatball: Synergizes with your Flame Walker, adding more fire and explosions to the beautiful chaos.
- Magnet: A simple quality-of-life item. You’re going to be killing thousands of enemies, and this ensures you’re sucking in all the XP gems without having to run around.
The Strategy: How to Pilot the Seizure Build
This build has a very specific game plan. You can’t just pick up the weapons and expect it to work.
Early Game (Stages 1-2): The Anvil Hunt
Your one and only goal in the early game is to survive and find an Anvil.
- Take Survival Items: In your first few level-ups, take anything that helps you stay alive and “smooths out the run.” Don’t worry about damage yet.
- The 60% Luck Rule: Do not open more than two chests until your Luck stat is at least 60%. High luck increases your chance of getting high-rarity items, like an Anvil, from chests. Opening them with low luck is a total waste.
- The Level 10 Weapon Rule: Try to keep your Dexecutioner and Katana below level 10 until you find an Anvil. This is because the Anvil’s power is more impactful the more upgrades you can put into a weapon after you have it.
Mid to Late Game (Post-Anvil)
Once you get that first Anvil, it’s go time.
- Pump Your Damage: Start dumping every single upgrade you can into your Dexecutioner and Katana.
- Prioritize SIZE: Whenever a Size upgrade appears, you take it. No questions asked. This is more important than raw damage for achieving the build’s true potential.
- Scale the Difficulty: Once you’re one-shotting everything, it’s time to start taking Curse/Difficulty upgrades to make the spawns crazier and the rewards better.
When to Reset
If you get to the end of Stage 2 and you still haven’t found an Anvil, the run is probably dead. You can try to push through, but you’re not going to see the true, screen-breaking, 12-FPS power of the build without it. It’s probably better to just reset and go again.