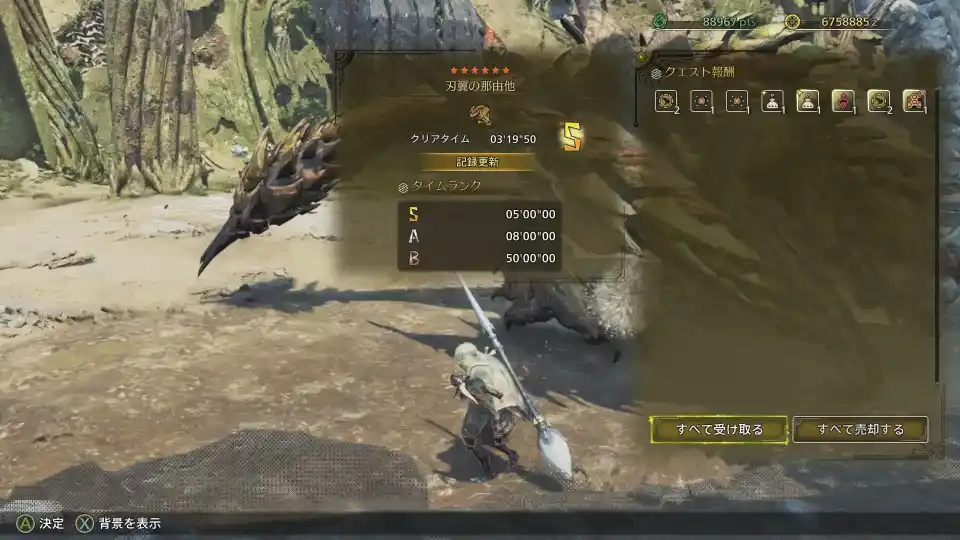
Monster Hunter Wilds – Advanced Guide to the Omega Savage SOS Hunt
Dominate the Omega Savage hunt in Monster Hunter Wilds with these advanced SOS tips from a seasoned hero. Learn crucial strategies for survival, DPS, and teamwork to boost your win rate with random players.
Monster Hunter Wilds Advanced Wisdom of a Savage SOS Hero
Credentials & Intro (WHY YOU SHOULD READ THIS AT ALL)
Here an Omega Savage SOS GIGACHAD (real) shares multiple pieces of [Advanced Wisdom] on how to improve your experience with this hunt, whether or not you are pubbing it! This guide assumes you already know the basic mechanics and won’t waste your time explaining them again for the most part.
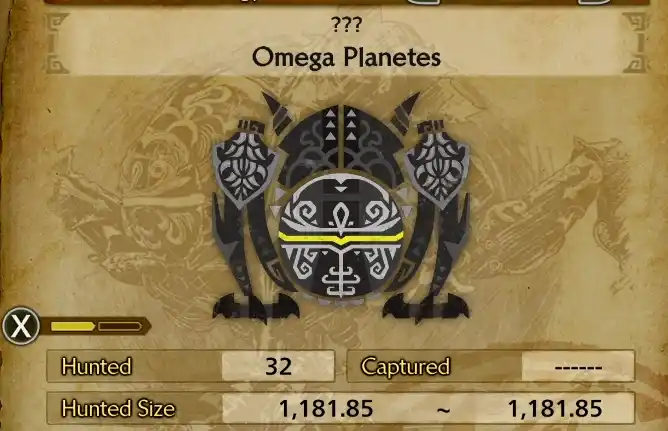
I have successfully farmed all gear available from Omega Planetes and I would say the overwhelming majority of my games were only with SOS randoms. A few — maybe 4-6 games — were with a friend who needed help with normal mode as they are not HR 100. ~17 of my wins were in Savage and ~14 were in Normal for a total of 32 successful hunts and likely countless attempts – I have 88 Nerscyllas hunted and previously never went out of my way to hunt that monster otherwise. One win was solo savage but because it was so close to 35 minutes the game seems to have counted it as a loss in score and a win in the hunting log. Wish I was joking.
My build contains Wide Range 5 but I never went out of my way to take Free Meal or Mushroommancer. I’ve thought a lot about how people die in pubs so here are some pieces of advice I think are particularly valuable to upping your win rate with random people and also making the fight easier in general. Pubs have become much better at either fight, for now, but I think they can still become much better. These tips are useful for mostly anyone but especially those choosing to pub it. Maybe I’ll make a video about it sometime but it’d be a sludge of clips with no real direction like some social media subway surfers slop and I don’t like that.
The Necessary Evil of Insurance
Insurance from a meal is effectively mandatory unless you’re constantly pairing up with gigachads in SOS. Savage is simply too chaotic. You can have everything go right in Phases 1-3 until Phase 4 where the pressure seems to get to the random populace and you’ll sometimes see pubs even start spamming Seikrets to dodge everything.
Of all the hunts I’ve had, I only certain one Savage hunt used no Insurance – this is because none of us carted at all. If you don’t have a Voucher or a Meal invitation from an NPC, at least Moxie meal for oneself will help reduce the cart burden. The Lord’s Soul effect, Guts, is also quite amazing for preventing an unlucky self-cart. Defender Meal is the bare minimum worth bringing along if you’re pairing it with Divine Blessing decos.
Farcaster is a Great Item
It will let you go back to camp in one button press. It will save you in bad situations like a Dash you aren’t confident dodging or a beam that you somehow can’t outrun or are unable to dodge well. Such a useful item and most of the time I never see pubs using it. Use it, carefully.
You are NOT a Speedrunner
Have you ever wondered why some people appear to die so frequently in pubs? One might be tempted to think it’s a lack of knowledge of the fight, which is a valid assumption and not far from the truth. This is however not the whole truth. I’ve checked six different pubs across Savage and Normal who I felt died extremely easily and all of their builds were exactly the same, give or take maybe 1-4 decorations of personal choice. How can this be? It’s because the players had only one thing in mind: DPS.
The complete neglect of any comfort skills – Quick Sheathe, Wide Range, Speed Eating, Recovery Up, Evade Extender, Evade Window, Divine Blessing, Guard Up and so on – is a huge mistake. Builds that are all DPS only work if you know the fight inside and out like me and can avoid or mitigate damage one way or another. Try a few of these decorations, see what you like. Evade Extender in particular is one that makes the fight a lot more manageable. It is so much less stressful to dodge Omega with EE2 or 3. There are set effects that make the fight more comfortable too in different ways.
You may be thinking, “But what about DPS? My contribution!”, and you’re right to feel that way. DPS is important, especially for Nerscylla. What is often left unsaid is that comfort decorations go both ways – you feel more comfortable playing because you can dodge and live longer and you also feel more comfortable because you got to do damage for longer than usual and feel like you are contributing. In the brief time I played Normal Omega my friend’s overlay often said I was second place or tied for second place if I wasn’t first and that was with me being the designated Wide Range Healbot. Of course, I play HBG. So your experience of this might vary.
Consider Wide Range
Some weapons, like Dual Blades, sheathe faster than others and can sheathe even faster with Quick Sheathe. This makes them perfect candidates for Wide Range 3 or 5 because they can heal with less of a commitment than something like HBG or Lance and go right back into the action. If you’re having trouble hitting his legs a lot, why not take a break and heal someone? You do not need to commit to a full on healer build to make your pubs less likely to die: Again, I only use Wide Range 5. I use about 30-60 healing items, majority of them mega potions, per full hunt. This is easily sustained through passive farming.
Your HP is still Your HP
Pubs rely way too much on Wide Range users and Dust users to manage their personal HP. If you can heal yourself at all in the course of an Omega fight? Congratulations. You are already looking better than many pubs. I am not exaggerating either. You are an elite if you can throw in the occasional dust of life too, despite everyone getting free dust on the Seikret pouch for this hunt. You don’t necessarily need to only heal yourself all the time if you have a Wide Range user but it seriously helps them if you are at least aware of your HP and when you can fix your issue yourself (and actually do so).
TL;DR: If you become dependent on Wide Range players to save your life, you risk playing so stupidly that the Wide Range user carts on your behalf trying to save you. It’s happened to me more than a dozen times.
Preventing Stranger Danger
Try not to run into your teammates when you are dodging aoes or get too close to them unless it’s a necessity like DPSing the legs or face or huddling together in a shield. If you must use a mount, use it manually, don’t let it simply wander into your allies. Overlapping or pooling of rocket aoes in one area can and will cart people.
Mustard Bomb Placement
Don’t place it in the middle of an arena or in the chokepoints (such as in Phase 2) if you can help it. It’s much harder for slower weapons to avoid this situation and that’s okay, what matters is you try to move it. The most optimal aoes would hug the edges of the arena.
Patience, A.K.A, That Which Eludes Pubs
When Omega moves to another arena, see if your team does too. Wide Range heals are not infinite and require replenishment. If people go back to camp, try not to go to the next arena until they return. Of course I am giving an impossible tip here. There will always be a random pub who rushes to the next arena and it’s a coin flip whether or not they die in the time it takes people to return.
If you see even one person go off alone into the next arena and you did not need to go to camp, go with them so you can split Omega’s attention until the team returns. If you’re desperate to stop the pub from throwing away a cart and still need camp, you can delay going back to camp for a bit if you brought a Farcaster.
An untested tip I have yet to try but felt worth suggesting to those that do have to go back to camp is the default auto-translated message you can add to a radial menu which says, “Hang on for a minute”. This message is shown in the player’s own language and in theory it might sway a pub or two, especially if combined with Signal.
The FREE Power of Mantle Gaming
You can use more than one Mantle per hunt if you return to camp and swap your used one out. I use three per hunt, sometimes four. Most pubs that I have seen might only use 1, maybe 2 if I’m lucky. In case you’re curious I use Corrupted Mantle, Rocksteady, Evasion / Healing Mantle roughly in that order. I don’t think Corrupted is necessary but I like to speed up Phase 1 or 2 with it. Omega is seemingly immune to Ghille; I’ve had him attack me with it on.
Shields – Loved And Vastly Ignored?
If Omega’s legs break, carve the fallen part for a Shield Generator. Someone having the Shield Generator is better than nobody having it. I had a hunt earlier where I was the only one to pick these up! And do remember to use them – I’ve lost in Phase 4 solely on pubs forgetting they even had them for the most dangerous attack sequences like the MRV barrage when there is no Tank.
Fear His Rage, Soothe Your Team
Whether or not you brought Wide Range, if you have Dust of Life or Lifepowder (Again, you get some for free from Seikret pouch) try to put yourself in a position to be able to use it safely when Omega begins his Pantokrator temper tantrums where he hops and stomps the ground everywhere while spamming aoe attacks. Although his attacks are predictable, his movement is essentially unpredictable during this sequence and can kill people who are not full HP very easily!
It is so important everyone be full HP or healing to full HP during this time that I would say it is worth it for a Wide Range user to spam Mega Potions during this sequence to keep everyone alive. This is why I bring materials to craft more mid-fight using the Radial Menu and a huge reason why I go back to camp very often.
Radial Menus
If you aren’t using these to craft, to heal, to activate Cleansers at Omega Savage to escape being Frozen: Why not? They are easy to set up and the utility is incredible and extends into basically every direction of the game. If by some chance you are reading this guide and have never experimented with Radial Menus, please, please do so. There are countless options available to you through them that will make the game feel smoother and less tedious. I use one with four options to craft a full inventory of mega potions and to use them, along with a button for Optimal Status Recovery and some other useful things like Whetstone.
The Art Of The Flinch
Multiple thunder pods (2-3 work fine) can flinch Omega and prematurely end his attacks, saving you and your pubs from carting disastrously. The most impactful flinches I feel happen if he is MRV barraging or dash spamming and you already know why. You can even save pubs that you know will die by flinching him as he’s readying a laser beam. Don’t waste this on the temper tantrum attack or a beam unless you absolutely have to – the tantrum causes leg wounds and the beam can be avoided or mitigated in many ways. Flinching him in this way has a long cooldown.
Nerscylla
This fight is simply the hardest part of SOS Savage and the reason I wait until Phase 3 to give everyone a full suite of buffs. There is simply not enough coordination in SOS pubs to anything more interesting to pass the check like baiting Nerscylla to the large breakable wall or the normalized strat which baits Nerscylla into a Morbol mid-swing. Try your best but expect the worst.
If you aren’t already, bring a fire weapon (particularly one you are comfortable using) to swap out solely for Nerscylla. Paralysis is an alternative especially for HBG / LBG on a swap since you can get a Bowgun with Fire ammo too. Paralysis I feel is more viable for premades where you can trust the other players to be able to DPS effectively – I ditched it after a few DPS checks where even with triple paralysis we could not pass the check.
Additionally, bring Rocksteady Mantle. Don’t be afraid to Dust of Life or heal (even only yourself) during this part of the fight; the Mantle will make it easier to do either. The DPS check is tight but most of the time you will lose if anyone carts to Nerscylla in Savage especially in an SOS. I can think of few hunts where I passed the DPS check with one person gone and only one hunt where two people were gone. You can also use Slinger Ammo like Rockburst Pods from Phase 3 to force Nerscylla to fall from the air when it swings.
Of course, this section assumes you are dodging the Morbols already and giving them the freedom to paralyze Nerscylla rather than killing them. And, of course, that you are familiar with its moveset.
The Tanking Dilemma of Phase 4
Sometimes you have to steal enmity in Phase 3 and 4 by hitting Omega in the head or using Mog of Ages on that same spot. Pubs cannot be trusted to reliably tank Omega most of the time and sometimes you don’t want them to even if they can do it. They can panic, get on their mounts, run in circles – this kills DPS and kills their ability to do damage.
Pubs tanking aggro is mostly only dangerous when the person with enmity has suffered multiple HP debuffs in pubs because people will often not steal aggro away, meaning the debuff might as well be permanent since it only ticks away if the person has lost or had no enmity to begin with. If you can’t tank Omega well for any reason but want to steal enmity to save others, pack a Farcaster for the hunt as a last resort. It will force Omega to reset aggro whenever he’s stuck to you but it will also send you back to camp. Use wisely.
The Grace of Asbestos
20 Fire Resistance will make you immune to Fireblight (fire damage over time on you) whenever Omega hits you with a fire attack. It will not save you from the fire pits on the floor in any way, as they do the same damage whether or not you have Fire resistance. Nonetheless, Fireblight immunity will help keep your HP more stable. As a side note, Immunizer will help with recoverable red damage on your HP bar and is fairly easy to craft.
Avoiding The Tokyo Drift Lifestyle
Always assume Omega will hit you if there is a wall behind you and he is dashing. His body spins at the end of dashes very often near corners or walls and this is effectively a second chance to hit for every dash. You can tell if he’s about to dash because his front half will bend down and his legs will splay out and away from his sides. I have also very rarely seen him stop a dash early and spin backwards without a close proximity to a wall. Be careful!
Small yet Meaningful Healing Tech for Phase 4
Save the Seikret pouch Dust and Powder healing items for Phase 4 especially if you are not using Mushroommancer. This part of the fight is incredibly annoying because pubs can often die whenever a Wide Range player has to go back to camp. You can have Dust of Life and Lifepowder in your item bag and the free equivalents in the same inventory. You can also radial menu craft Dust of Life if you bring the materials. I always save the free heals for Phase 4 and I advise anyone to take them too. Any bit of healing from anyone can make the difference in this phase!
The Utility Of Not Quitting (When Progressing)
It’s tempting to leave whenever there are multiple carts in Phase 2 or 3. Don’t. At best, you save a few minutes – the fight will likely end in Phase 2 or at the DPS check anyway. Omega Savage is a fight that will force you to learn every little thing about your weapon and about his mechanics. The more of everything you know about the fight and the calmer you become from your attempts the better off you will be. If you happen to be a Wide Range player like me you’ll be able to heal people drastically more and still contribute lots of DPS once you’ve got a solid understanding of Omega and the composure to execute upon it.
Make Friends. Or Don’t.
Savage is considerably easier with friends, though it’s still hard. While I do think it’s doable via SOS I also know it would’ve taken me far less time had I been willing to find people to play it with. But I considered it the only real challenge this entire game has and I wanted to rise to the challenge. I don’t regret it really; I can’t wait for G-Rank. So ask yourself: are you like me? Then incorporate everything I’ve written into your gameplay, keep bettering yourself, you’ll need it.
If you simply want the loot, simply make friends or find a group.
If you prefer not to use third party platforms but want to try and find a slightly more organized way of pubbing things you can simply join a Recommended Lobby and look for people trying to complete Savage Omega there.
VOD Review Is A Strategy Of Kings
I learned so much about why I was carting once I started using an OBS Studio Replay Buffer to see the last minute of every one of my carts. It’s humbling but you will improve so much faster if you look at clips.
Conclusion and Gratitude
Good luck out there. Personally, I see myself continuing to pub Savage in the future. 300 Savage Wins maybe? It’s a challenging fight and I know how happy it makes people to get their first win, especially in the trenches of SOS. If this guide helped you, let me know. Thanks for reading.