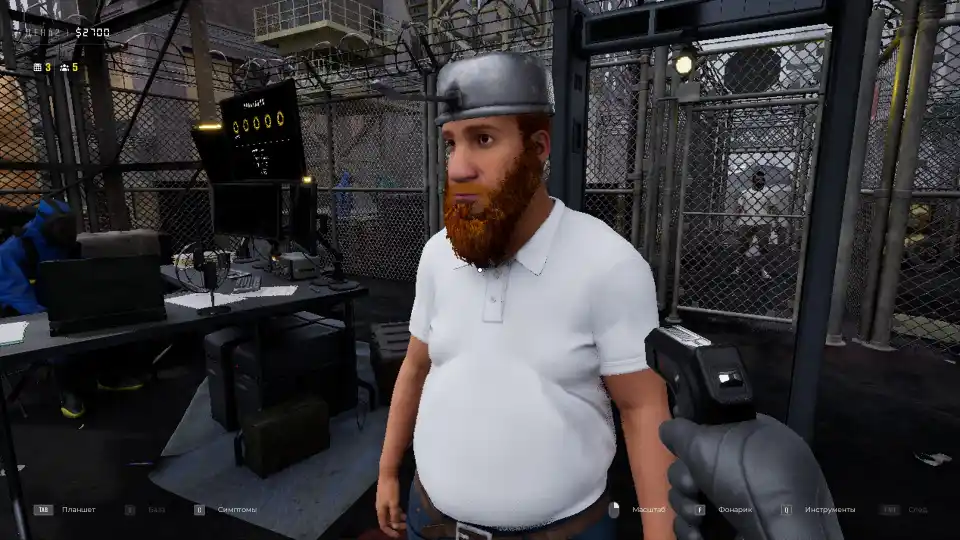
Quarantine Zone: The Last Check – How To Unlock Symptoms in the Laboratory
If you come across a symptom you do not recognize, you can send the survivor to the laboratory.
How To Unlock Symptoms in the Laboratory
Follow them there and wait for them to strap into the machine, then access the computer nearby. This will start a minigame where you control a laser.
W and S will raise and lower your aiming circle. A and D will rotate around the survivor. Mouse controls a pointer that is bound to the aiming circle.
When the mouse highlights a muscle, bone, or organ it will turn orange, red, or green.
Orange means you can destroy the item with a laser by left clicking, red means you should not destroy the item and doing so too many times can fail the entire minigame, green is the item you want to extract by holding E instead of click.
Use a combo of rotating and destroying obstacles to uncover line of sight to the green item. Once extracted, the survivor falls over dead, shockingly destroying a handful of internal structures and organs with a laser isn’t exactly survivable, but if they were not infected you will not be penalized. The extracted item will appear in a box to your left, pick it up and drop it in the machine right by the box and press E to turn the item into a vial, put the vial in the analyzer on the table and press E again to discover a new symptom, if one existed in the first place.
Tip: You can extract whatever you want, but only one thing per survivor. Extracting a brain can be used to get an achievement by carrying it to the living block and tossing it into the basketball hoop.
The Symptom Scanner
At later base upgrades you can upgrade the metal detector at the entrance to detect symptoms.
Doing so will put a string of lights on top of the scanner, each one matches a type of symptom. Example: The heart symbol matches the thermopulsometer.
When a survivor walks through, a number of symbols can light up and remain lit until the survivor leaves.
If a symbol lights up, the survivor might have one or more symptoms from that category, but also might not have any as a false positive.
Example: If the appearance symbol lights up, a survivor might have a change to their eye color, a skin rash, and a nose bleed on top of it. Or could have no appearance symptoms at all. If the thermopulsometer symbol lights up, they could have high temperature and fatal pulse, or could have green temperature and pulse and be just fine.
If a symbol does not light up, the survivor will not have any symptoms in that category meaning you can freely ignore checking it.
Example: If the appearance symbol doesn’t light up, there is no need to even look around or use the scanner to check them, as they won’t have any symptoms in that category at all.
Note: I only ever had mine fail once, in detecting a hidden UV light symptom the symbol didn’t light up. However as this only happened once in my entire playthrough, so determine your own trust level in the scanner I suppose.
Symptom Danger Ratings
Symptoms are rated into three colors based on how dangerous they are.
Green symptoms are safe, and a survivor does not need to be quarantined or liquidated for having them. Even a survivor with ten different green symptoms is perfectly safe to allow into the living block.
Orange symptoms are dangerous, but not guaranteed to be from the zombie virus. A survivor with even one orange symptom might turn into a zombie, or they might recover, it is best to quarantine any survivor with orange symptoms, and check them each day to see if the symptoms get better or worse. If they get better or go away, let them out, if they get worse or remain for multiple days, it is best to liquidate them. Also, most survivors will turn into a zombie by the third day in quarantine, so if they last that long and aren’t a zombie they should be fine. And careful about bundling a bunch of survivors in with someone who has been in there a day already as if they turn, they take the whole quarantine cell down too.
Red symptoms are symptoms of the zombie plague. If a survivor has even one red symptom they must be liquidated. No reason to quarantine as these symptoms will not improve. And if they are let into the living block, they will turn and kill at least one other survivor overnight.
Objects
This set of symptoms refers to survivors bringing in a backpack, you can open the pack and reveal contents on the table nearby the investigation area. These symptoms do not need to be marked to count towards excellent inspections. Most of these do not count as any kind of symptom and should not factor into decisions on where the survivor goes, unless you have a side mission stating otherwise.
These symptoms do not cause the symptom scanner to light up, however there are separate scanner upgrades to detect backpacks with weapons, drugs, and zombie parts when a survivor enters.
Baggage
This simply means a survivor brought in a backpack.
Weapon
This means a survivor has brought in contraband. It can be a weapon, ammunition, or drugs. You can confiscate any of these for $100, but be careful as grabbing the wrong thing will instead remove $100. Some drugs are prescription medication which I do not believe count as contraband. Tip: If you confiscate gasoline, food, or medication you will still lose $100 however the item is supposed to be added to your storage for the base buildings. The game tells you this, however I never confirmed it because $100 is more expensive than just buying the supplies normally.
Contaminated Baggage
Red Symptom Appears as any bloody human parts. Can be limbs, fingers, heads, bones, organs, etc. The survivor is considered infected simply by having these regardless of other symptoms and must be liquidated. Note: Some survivors come with a pile of human teeth arranged in a semicircle, for some reason these do not count as contaminated baggage. Tip: Confiscating these costs you $10 because you aren’t supposed to touch them, however you do get an achievement for doing it once.
Internal Contraband
Appears as items visible hidden within the survivor’s organs using the x-ray tool. Hover over the item and press E, then exit the x-ray and talk to Charlie, the man in the white hazmat suit, he will extract any tagged items and set them on his little tray for confiscation if they are contraband. Tip: Items can be found in the bottom half of the intestines, stomach, esophagus, or mouth. Note: These items can be infected body parts, I found someone with a severed finger up their…ahem regardless, confiscating the finger gave me the -$10 for zombie contraband, so assumedly the person with this item should be treated as infected.
Note: As of writing this guide, there is a bug making all internal items not appear at all in the x-ray. Hovering over an item will cause the ‘E Tag’ button to light up, allowing you to press it and extract as normal. Simply check the spots from the tip and pan around to see if the button lights up, repeat until it stops lighting up to ensure you got it all as there is a $100 fine for not doing so.
Appearance: Eyes
The appearance tab of symptoms contains quite a lot of symptoms so I will be splitting this one up into several categories. You can use the scanner tool to see through a survivor’s clothing, and the flashlight to brighten the area you are viewing.
Appearance: Eye symptoms involve the color of the survivor’s eyes.
Yellow Eyes
Green Symptom Appears as the whites of the survivor’s eyes turn bright yellow. Tip: If using the matioscope, the entire inside of the eye will also be colored yellow.
Conjunctivitis
Orange Symptom Appears as the corners of the survivor’s eyes turn red, and they may appear puffy or cloudy. Tip: If using the matioscope, there will be no visible changes to the inside of the eye. Which can be used to determine if the eye is just conjunctivitis or outright red. Note: It may be possible to have a survivor with both different colored whites and conjunctivitis, if you aren’t far enough along to use the matioscope to verify eye color internally, pay very close attention to the small amount of white you can still see.
Red Eyes
Red Symptom Appears as the whites of the survivor’s eyes turn bright red. Tip: If using the matioscope, the entire inside of the eye will be colored red.
Appearance: Skin Markings
The appearance tab of symptoms contains quite a lot of symptoms so I will be splitting this one up into several categories. You can use the scanner tool to see through a survivor’s clothing, and the flashlight to brighten the area you are viewing.
Appearance: Skin Markings have to do with marks, natural or through damage/disease, on the skin. They can generally show up anywhere on the skin, even under clothes and in hard to spot places like feet, hands, or the sides behind the arms.
Freckles
Green Symptom Appears as a large amount of small, usually brown or orange dots on the survivor’s face, across the cheeks and nose.
Herpes
Green Symptom Must be unlocked in the lab Appears as a rash of small misshapen splotches, typically brown or red, and without any zits.
Bruises
Green Symptom Appears as either a single large, or several medium, splotches typically a mix of blue, green, and yellow.
Skin Rash
Orange Symptom Must be unlocked in the lab Appears as a rash full of zits and whiteheads, and very small splotches around the zits.
Skin Cuts
Orange Symptom Appears as a single large splotch, often lighter than the surrounding skin, with tons of faint or thick scratch marks within the splotch.
Red Bruise
Orange Symptom Appears as several splotches dark red in color.
Necrosis
Red Symptom Appears as several splotches dark black in color. Tip: Be careful about not mistaking tattoos for skin markings, Especially do not mistake them for necrosis and liquidate someone, as many tattoos are in black ink. Look for obvious artistic and manmade patterns like faces, wings, recognizable symbols, or words to determine if something is a tattoo.
Bite Mark
Red Symptom Appears as a set of bloody, human teeth marks. There are no animal bites in this game, every bite you see is a zombie bite.
Tip: Some survivors have vitiligo, a condition where darker skin starts to lose patches of melanin and appear white in uneven shapes. This is not a symptom, but can play a role in identifying people for the bulletin board or side quests.
Appearance: Skin Color
The appearance tab of symptoms contains quite a lot of symptoms so I will be splitting this one up into several categories. You can use the scanner tool to see through a survivor’s clothing, and the flashlight to brighten the area you are viewing.
As may be obvious, Appearance: Skin Color refers to abnormal coloration of the survivor’s skin.
Red Skin
Green Symptom Appears as reddening, or blush, on the survivors face only. Can be just on the cheeks or the entire face.
Pale Skin
Orange Symptom Appears as the entire survivor’s skin looking either fully actually gray, or simply desaturated.
Green Skin
Red Symptom Appears as the entire survivor’s skin appearing green or very yellow.
Tip: Pressing tab will bring up the survivor’s file, including a picture of their normal face. This picture can be used to compare to their current skin color and look for differences.
Appearance: Face
The appearance tab of symptoms contains quite a lot of symptoms so I will be splitting this one up into several categories. You can use the scanner tool to see through a survivor’s clothing, and the flashlight to brighten the area you are viewing.
Appearance: Face involves things localized to the face, that are not marks on the skin. Like secretions or expressions.
Nosebleed
Green Symptom Appears as two lines of blood, one from each nostril. Tip: Be wary of mustaches.
Mouth Bleeding
Orange Symptom Must be unlocked in the lab Appears as a good amount of blood coating the lower lip and running down towards the chin. Tip: Be wary of beards.
Aggression
Orange Symptom Appears as the survivor having an angry expression, and often insulting the player when interacting. Tip: Aggressive people have a higher than average chance of attacking the player when sent to quarantine or liquidation, have the pistol ready to go before sending them off.
Eye Pus
Red Symptom Must be unlocked in the lab Appears as a small drop of green pus on the corner of one eye (Might be possible to see in both, unsure). Can be very small and hard to see especially on certain shades of skin color.
Nose Pus
Red Symptom Must be unlocked in the lab Appears as a drop of green pus from one nostril, is usually quite prominent and easy to spot, though again, be wary of mustaches.
Thermopulsometer
The thermopulometer is a tool that lets you read the heart rate and temperature of a survivor. The symptoms are based on how high above normal the numbers go. There are no green symptoms in this category so no need to mark anything if the numbers are normal.
Note: My units are in Fahrenheit but Celsius is also an option. Check your symptoms list for the exact numbers!
Tip: Temperature takes a few seconds to rise, do not take the first initial reading, let it sit until the temperature mellows out and stops increasing. It will start out just fine then can quickly rise to over red range. Pulse, however, will immediately be within the correct range.
Tip: A survivor with these symptoms might cough, sneeze, or hiccup.
Elevated Temp
Orange Symptom Appears as temperatures over normal body temp, but still what would be considered a fever. 98.6 degrees F to 105 degrees F.
Elevated Pulse
Orange Symptom Appears as pulse between 120 and 180 bpm.
High Temp
Red Symptom Appears as temperatures above what humans can typically survive. Over 105 degrees F.
Extreme Pulse
Red Symptom Appears as pulses over 180 bpm.
Sthethoscpe
The stethoscope is a tool for checking a survivor’s breathing patterns. When equipped you will see a survivor’s lungs, and several black spots. Hover over a black spot and listen to the breathing pattern to determine the symptom.
Tip: A survivor with these symptoms might cough, sneeze, or hiccup.
Tip: You only need to mark the worst symptom. You do not need to mark the green symptom even if you can hear it if there’s an orange or red one.
Sickly Breath
Green Symptom Sounds like breathing with a slight wheeze.
Nonspecific Respiration
Orange Symptom Must be unlocked in the lab Sounds like a heavy wheeze and some gurgling mixed in.
[Unnamed Zombie Sound]
Red Symptom Must be unlocked in the lab Sounds like a zombie growling instead of any kind of breathing.
Hammer
The hammer is a medical hammer you use to test reflexes of the survivors.
Tip: Aim for the survivor’s forearms and take a couple swings for the most visible reaction, their arm will swing a good distance, like a foot, away from the hit. If this happens, it is no symptom at all.
Note: Hitting will leave a tiny bruise in it’s place, keep it in mind and do not mark it as a separate symptom.
Tip: Survivors with one of these symptoms will have an open mouth and slack jaw.
Absent Reflex
Green Symptom Appears as the survivor’s arm barely moving, it will jerk a little, like an inch, but not swing at all regardless of how many times you hit it.
Hyperaggressive Reflex
Orange Symptom Appears as the survivor taking a swing at you with a clawed hand upon being hit, note this will do damage to you if you are close by so be careful.
Crossed Reflex
Red Symptom Appears as the survivor’s opposite limb having the reaction, if you hit the right arm, the left one swings instead. Note: A hyperaggressive survivor will swing at you with the arm you hit, however a survivor with both hyperaggression and crossed reflex will swing at you with the opposite arm.
Tip: Hit a survivor in the head to knock them over and get an achievement, you can also hit male survivors…somewhere else for another reaction. There’s no downside to either of these actions, unless you upgrade the hammer to be lethal in which case take more care in using it.
Matioscope
The matioscope is a device allowing you to look inside a survivor’s eyeball and look for little nasty things swimming around.
Tip: Zooming all the way out immediately is usually enough to see everything inside the eye just fine, albeit some may be blurry.
Tip: Survivors with these symptoms will have mostly closed, droopy eyelids. This makes verifying eye appearances much more difficult, however refer to the tips in the Appearance: Eye section for ways the matioscope can help you check for those symptoms as well.
Ocular Spicular Bacterium
Green Symptom Appears as a pink or slightly orange-ish tube with branches floating in the eye, occasionally twirls.
Thread Cluster
Green Symptom Appears as a bundle of white threads in the eye, remains stationary.
Ocular Helminth
Green Symptom Appears as a small translucent worm that wiggles in a straight line through the eye.
Adenoviral Body
Green Symptom Appears as a greenish-orange ball with long nubs, occasionally pulses.
Phage Complex
Orange Symptom Appears as a cylindrical head on tiny legs, floats in a straight line through the eye.
Chromatic Staphylococcus
Orange Symptom Appears as a smudge of greenish-yellow goo that has a wavy motion to it.
Necrotic Plume
Red Symptom Appears as a dark black, blurry smudge. Usually vaguely diamond shaped.
Corneal Infiltrate
Red Symptom Appears as a dull green ball with tiny brown nubs.
Tip: Most survivors with these symptoms will have quite a few of them, and occasionally one will only appear on the bottom layer of the eye, so make sure to find every single one floating in there.
Note: Occasionally these little guys may appear in colors different than described or pictured in the symptom journal, the important thing is the shape of the thing. So a pink guy that’s a bit orange, or an adenoviral that’s a bit red are the same symptom as before.
X-Ray
The X-Ray tool is held up with click, allowing you to inspect the survivor’s organs. You can scroll to change layers and limit the view to certain organs.
Note: You can only see the liver on the starting base layer, and you can only see the brain on the third, bottom layer.
Tip: Survivors with these symptoms will occasionally hold their stomach and bend over.
Internal Bleeding
Green Symptom Appears as an organ that is still a normal reddish color, but covered in bleeding sores.
Fatty Hepatosis
Green Symptom Must be unlocked in the lab Appears as an organ covered in yellow splotches. Note: The pancreas, tucked back behind the intestines, always appears yellow and is not an organ you need to monitor for symptoms.
Color Differences
Orange Symptom Must be unlocked in the lab Appears as an organ colored normal purple, or slightly pinkish purple.
Moldy Organ
Red Symptom Must be unlocked in the lab Appears as an organ colored teal blue.
Organ Necrosis
Red Symptom Must be unlocked in the lab Appears as an organ almost fully covered in dark black splotches. Note: I ran into a bug where I had to unlock this one twice in the lab, this bug may be fixed later, however if you attempt to unlock this and instead receive an unlock screen stating you unlocked something but displaying nothing it means you need to unlock organ necrosis a second time.
Tip: Survivors can have multiple different symptoms across multiple organs.
UV Tower
The UV Tower is a tool attached to your table instead of in your inventory. Press the button to bathe the investigation area in UV light, it lasts a few seconds and takes time to recharge, but can be used multiple times.
UV Vapor
Green Symptom Appears as a green mist surrounding some part of the survivor while UV is active. Note: Some survivors have a fly buzzing sound effect, while not a guarantee I have often found them also having this symptom. Not sure if there is a correlation, but the fly doesn’t seem to signify anything else.
UV Contraband
Red Symptom Appears as a green glowing spot on any item from the survivor’s backpack while UV is active. Tip: Don’t confiscate contraband until after you check for this.
UV Symptom
Red Symptom Appears as a red appearance symptom that is invisible normally, but glows green during UV. Note: I have seen bites, necrosis, and eye/mouth leakage appear as UV symptoms, though there may be more.
By Darth Zed