Train Sim World 6 – TSW6 UK Signals Guide
This is your ultimate cheat sheet to understanding all the British Rail signals in Train Sim World 6. We’re breaking down every color-light signal, banner, feather, and shunt signal you’ll ever see on the UK routes.
Aight, so you’ve just hopped in the cab of a British train in Train Sim World 6, ready to cruise. You’re feeling the vibe, and then you see it: a confusing mess of flashing lights, diagonal bars, and glowing numbers. What does it all mean? Are you supposed to stop, go, or prepare for a rave?
Don’t trip. UK signaling looks complicated, but once you know the basics, it’s actually super intuitive. This guide is here to be your co-pilot, breaking down every signal you’ll encounter on the modern UK routes. By the end of this, you’ll be reading the rails like a seasoned pro. Say less, let’s get into it.
The Basics: Colour-Light Signal Aspects
Think of these as the traffic lights of the railway, but with extra spice to give you more information. In TSW6, these are the main signals you’ll be dealing with.
- Green (aka “Clear”): This is the best signal you can see. It means full send. The track ahead is clear, and you can proceed at the permitted line speed.
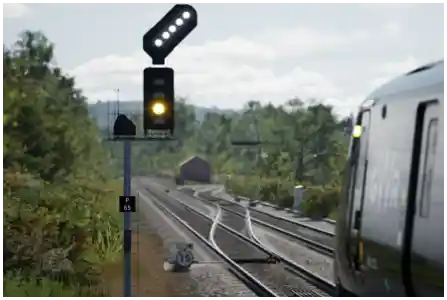
- Yellow (aka “Caution”): This is your heads-up. A single yellow light means the next signal is red. You need to start slowing down and be prepared to stop.
- Double Yellow (aka “Preliminary Caution”): This is a heads-up for your heads-up. Two yellow lights mean the next signal is a single yellow, which means the signal after that is red. This gives you way more time to brake, especially on high-speed lines.
- Red (aka “Danger”): Big yikes. This means stop. Immediately. The track ahead is occupied or unsafe. Do not pass a red signal without permission from the signaller.
- Flashing Yellow: You’re about to take a turn. A single flashing yellow means you’re approaching a junction and will be diverging onto a different route with a lower speed limit. Slow your roll and be ready for the switch.
- Flashing Double Yellow: This is the early warning for a diverging route. It tells you that the next signal will be a flashing single yellow.
- Flashing Green: This is pretty rare and usually only seen on high-speed lines. It means you can proceed at the absolute maximum speed allowed.
Aspect Counts: Why Do Some Signals Have More Lights?
You’ll notice that signals come in different sizes. It’s all about how much warning they can give you.
- Two-Aspect Signals: Just show Red or Green. Simple stop/go for low-speed lines.
- Three-Aspect Signals: Add a Yellow light. This gives you the basic “caution” warning.
- Four-Aspect Signals: Add a Double Yellow. These are used on busy main lines to give drivers the maximum possible braking distance. More lights = more information.
Can’t See the Signal? Check the Banner Repeater
Sometimes, the main signal is hidden by a curve, a bridge, or a tunnel. That’s where banner repeaters come in. They’re basically a preview of the signal up ahead so you’re never driving blind.
- Horizontal Bar (On): This means the next signal is red (or sometimes yellow). It’s restrictive. Be prepared to stop.
- Diagonal Bar (Off): This means the next signal is a “proceed” aspect (green or a shade of yellow). You’re good to continue, but still be ready for what’s next.
- Diagonal Bar with a Green Light: This is a special one that explicitly confirms the next signal is a solid green. You can confidently keep your speed up.
Where Am I Going? Feathers & Route Indicators
These are attachments to the main signals that give you directions. They’re your GPS for the rails.
- Feathers: A feather is a strip of five white lights that points in the direction you’re about to go at a junction. If it’s lit up and angled to the left, you’re taking the left track. If it’s angled to the right, you’re going right. Easy peasy.
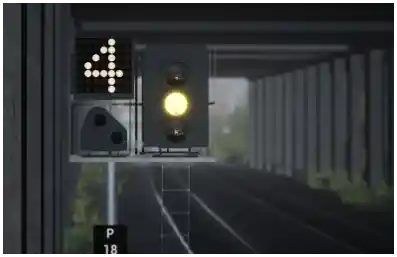
- Route Indicators: This is a box, usually on top of the signal, that displays a number or a letter. This tells you exactly which platform or track you’re routed to. This is super useful in massive, confusing stations where you need to know if you’re heading to Platform 4 or the sidings.
Low-Speed Life: Shunt Signals & Position Lights
When you’re shunting in a yard, moving around a depot, or creeping into a busy station, you’ll be dealing with these small, low-to-the-ground signals. They’re all about slow, cautious movements.
- Ground Position Lights: These are the main type of shunt signal.
- Two White Lights (Diagonal): This means “proceed with caution.” You can move past the signal, but you have to be ready to stop short of any obstruction, like another train.
- Two Red Lights (Horizontal): This means stop. Do not pass.
- Subsidiary Signals (Calling-On Signals): These are small position lights attached to a main signal, usually at a station platform. If the main signal is red, but the subsidiary shows two diagonal white lights, it means you’re being “called on” to a platform that’s already occupied. You can proceed, but you have to crawl in at a super low speed, ready to stop right behind the other train.
- Limit of Shunt Signal: This one looks like a ground position light, but it can be a real trap for new players. It only has two horizontal red lights and can never show a proceed aspect. It’s a permanent stop sign that marks the absolute boundary of where you’re allowed to shunt. Don’t ever pass it.
And that’s the lowdown on UK signals. It seems like a lot, but once you’re in the cab, you’ll get the hang of it in no time. Just remember the basics: green is go, red is stop, and yellow means think about stopping. Happy driving!
by moss